How to Add a Clear Coat to Your Wood in Four Easy Steps
Exterior exotic wood is expensive, and it wneeds to be protected to last its entire lifespan. Staining wood with an exterior clear coat is important to maintain its quality and sturdiness. Clear coatings are water-resistant to protect wood from adverse weather. That means you'll have your wood protected against bacteria, mold, and even fungi. Olympic Smart Guard sealer is an innovative coating designed for fence, deck, and even concrete application. It is simple to apply, needs no sophisticated tools, and most projects can be completed in one day.
Coat and protect your fence or deck in these four simple steps.
See All Olympic Exterior Wood Stain Products

Step 1: Calculating the Amount of Wood Stain Needed
Exterior Clear Coatings For Wood
The amount of exterior clear coat needed to finish the job will vary accordingly from one user to another. Factors that determine how much stain you can use include the size of the application area and wood type.
For instance, a solid wood color requires up to two stains for maximum protection and aesthetic appeal. For bigger projects such as staining the whole fence, you'll definitely need more clear wood coating. Smaller projects like a patio won't consume more. You can roughly estimate what you need when it comes to small projects. However, for bigger projects, it helps if you leverage our stain calculator. Using the calculator is simple, as you only need to select your project in our categories, and we will tell you the right amount required.
It is important to note that using the right amount of clear wood coating guarantees the best long-lasting results. Remember, it helps if the whole coating dries once and evenly. Leaving a project behind to get additional coating can be inconvenient, not to mention costly.
Use Our Stain Calculator

Step 2: Cleaning Your Patio, Deck, or Concrete Surface
Exterior Clear Coatings For Wood
After discerning the right amount of coating needed, you can start the actual process by cleaning the surfaces.
Examine the wood surface to ensure no sharp objects or splinters are evident. For instance, you should watch out for screws, broken nails, and metal staples. Removing these objects ensure you have a smooth surface for better adhesiveness.
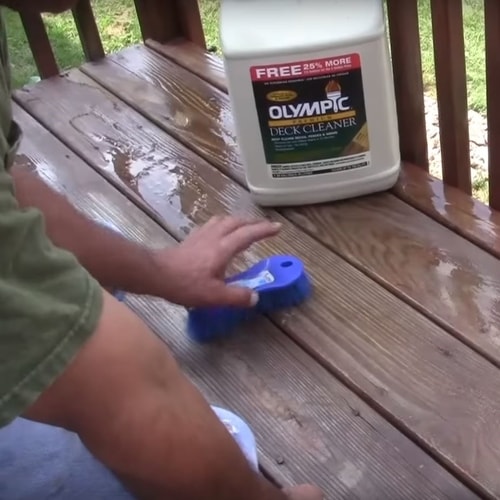
Next, use a stiff brush to sweep debris and hardened mud from your wood surface. This presents a clean surface to apply the Olympic Premium Deck Cleaner. This solution mainly wipes away dirt and stains resulting from mildew.
See All Olympic Deck Cleaners

Slat of wood stained in different colors
Step 3: Prepping Your Application Surface
Exterior Clear Coatings For Wood
Do you want to stain the entire wood surface? If no, use a masking tape to section off the surfaces you don't want stained. The same applies to concrete and patio surfaces. For accuracy, use a thread attached on both ends to get a straight line. You can also use a measuring tape so that you don't end up with a "roughly" stained surface.
At this stage, you should move your wood to a cooler place, preferably under a shed. Working under the sun will make the stain dry unevenly. It can also be tiresome, which can impend your ability to finish the job in a day. Remember, once you've cleaned the wood, you shouldn't wait for another day as dust and mildew stains may build up again.
Depending on your application surface's size, prepping shouldn't take as much time as the cleaning process. If you want a clearer application surface, you can also polish the wood using sandpaper. However, that can be tiresome, and you may need extra help.
See Color Advice Articles

Step 4: Applying the Clear Coat
Exterior Clear Coatings For Wood
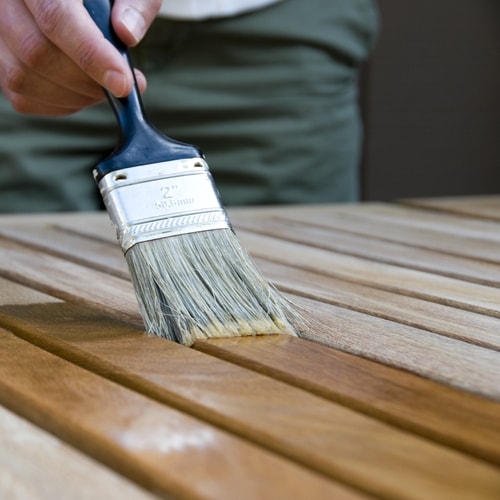
After prepping your surface, it is now time to apply the clear coating to wood. Applying the coating is not a delicate process but will require patience for the best results. Apply coating to one board at a time. Once the whole board is covered, you should backbrush into the wood surface for deeper penetration and to achieve a streakless, complete coating.
Don't forget to refer to the product label for technical and safety specifications prior to starting your project. You should also check the safety data sheet that requires you to have protective gloves and coveralls to protect your hands and clothes from any spilled coating.
Another essential thing to consider is positioning the wood surface if you aren't painting an erected piece. Ensure that you can access all the surfaces without having to turn them over. After application, leave your wood to dry naturally. Don't expose it to direct sunlight until after one hour, when the clear coat is completely dry. Now you have your wood protected for the next couple of years!
See All Olympic Exterior Wood Stain Colors

Summing It Up
Exterior Clear Coatings For Wood
A simple maintenance routine such as applying a clear coat to your wood prolongs its life, and guarantees your investment value. You don't need any technical assistance or to spend more money on hiring someone to do it. Just a simple cleaning and application process, and you have your wood protected in less than a day! The only precaution you need to take is to give the coating enough time to dry properly. This simple DIY project will add years of beauty and protection to your home.
See All Wood Stain Advice


