Q: How do you stain a deck that has already been stained?
A: Need some wood staining advice? As the years go by, your wooden deck can begin to show signs of aging and weathering from the elements. High traffic areas of the stained deck show signs of being worn down. Eventually it becomes inevitable that you’ll need to re-stain your deck. This doesn’t have to be a daunting task though. The entire re-staining process can be completed in as little as 4 steps provided you have the right wood stain and the right guide!
Explore All Deck Stain Colors
Buy Deck Stain Online

How To Stain A Previously Stained Deck
Step 1
Cleaning the Deck
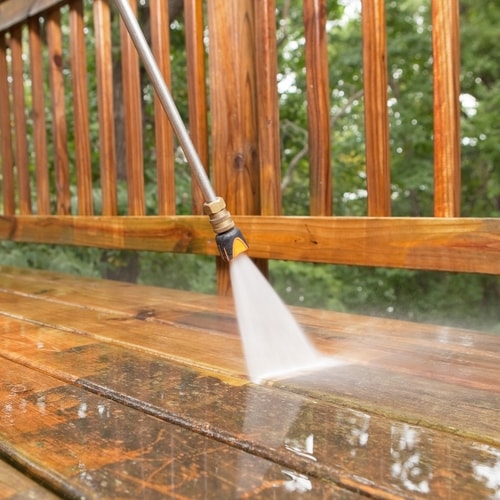
First and foremost, you’ll need to clean the deck. If you are using a pressure washer, start in a corner and work your way across the deck, making multiple passes over each section. Once finished, let the deck dry for 72 hours. After it dries, sweep it off one more time before you begin re-staining. You don’t want to stain on top of any dust, as dust will hinder the wood stain from adhering to the wood.
If you don’t have a pressure washer, an alternative method is to use a high-quality deck cleaner, like Olympic Premium Deck Cleaner. When using a deck cleaner, you’ll need to first sweep the deck off to remove any loose debris and dust. Then apply a layer of the deck cleaner to the deck. As it penetrates the wood, it removes dirt, mildew, algae, mold, leaf marks, and other stains. Rinse off the deck cleaner and let the deck fully dry before moving on to the next step.
Buy Olympic Premium Deck Cleaner Online
Please refer to the Product Label, Technical Data Sheet (TDS) or Safety Data Sheet (SDS) for safety and detailed application instructions.

How To Stain A Previously Stained Deck
Step 2
Sanding & Stripping
Glance over the deck and see if there are any rough or coarse areas that need to be sanded.* Also check for areas where the previous wood stain might be peeling off. These areas will need to be sanded out as well. If you stain on top of peeling stain, the new layer of wood stain will end up peeling right off with the old one before you know it.
Additionally, if you want to make sure you have as even a color as possible you need to use a stripper. Olympic Premium Deck Stripper is formulated to help remove old stain so that new stain can penetrate properly and look uniform in the hue you have chosen.
Get Olympic Premium Stain Stripper
Buy Deck Stain Online
* WARNING! If you scrape, sand, or remove old paint, you may release lead dust or fumes. LEAD IS TOXIC. EXPOSURE TO LEAD DUST OR FUMES CAN CAUSE SERIOUS ILLNESS, SUCH AS BRAIN DAMAGE, ESPECIALLY IN CHILDREN. PREGNANT WOMEN SHOULD ALSO AVOID EXPOSURE. Wear a properly fitted NIOSH-approved respirator and prevent skin contact to control lead exposure. Clean up carefully with a HEPA vacuum and a wet mop. Before you start, find out how to protect yourself and your family by contacting USEPA National Lead Information Hotline at 1-800-424-LEAD or log on to www.epa.gov/lead. Follow these instructions to control exposure to other hazardous substances that may be released during surface preparation.
Olympic Staining Tip
Always test a small, hidden area, using the same number of coats you will be using on the deck and let it dry so that you can be sure to get the wood stain color you want.

How To Stain A Previously Stained Deck
Step 3
Staining The Deck: First Pass
The type of wood stain you are using will factor into how many coats you need to apply:
-
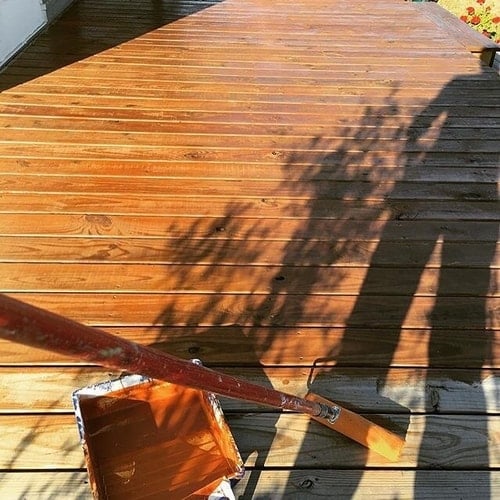
If you’re using a wood toner, semi-transparent stain, semi-solid, or clear wood sealant, you’ll need to apply one coat using a high-quality roller, brush or sprayer.
-
When using solid color stains, apply two coats using a roller brush or paintbrush.
Whether you apply one coat or two, apply an even, thin coat going with the grain.
Explore All Exterior Wood Stains
Buy Deck Stain Online

How To Stain A Previously Stained Deck
Step 4
Staining The Deck: Touchups
Now that the entire surface is stained, you’ll need to backbrush to make sure all the wood is covered.
Use a paintbrush to push wood stain in between each board, into the seams, and into the edges.
Find the Right Stain Color for Your Deck
Buy Deck Stain Online


